NEW! Blood Crushers

After a recent trip to my local FLGS I picked up the new Blood Crushers box. They allow you to trade in good condition books for store credit. Luckily for me I had a few nice books laying around collecting dust, lol.

The new Blood Crushers are fantastic. Not only are they all plastic (woot!) but there are also some extra bits to customize them how you like. Very niiice!

Aside from being plastic, the models fit together very nicely. My biggest complaint for the old models was that the riders kept falling off. The new models, however, fit together in multiple places. This really helps keep them together. Also, plastic fuses together with super glue so you don't have to worry about them falling apart with normal wear and tear.

In the box you have the option of five different Blood Letter (rider) and Juggernaught (mount) heads. They also supply you with five round bases and square ones too.

The riders also have the option of wielding the standard Hellblade or a variety of other weapons. I decided on equipping them with the Icon of Chaos, The Herald's war gear, and a standard Hellblade.

I didn't use the Instrument of Chaos since I never play it. This upgrade allows you to win assaults resulting in a draw. In my experience with these guys they either win or lose in assault by no small margin making the instrument not worth the points.


The above pic you can see it overhanging the base quite a bit. It may hinder base to base contact somewhat, but hey it looks cool :P


This model needed a little pinning to keep it in place. After drilling the pilot holes I took a small piece of bronze rod and formed a "u" joint. A few nickels were then added to for counter balance.


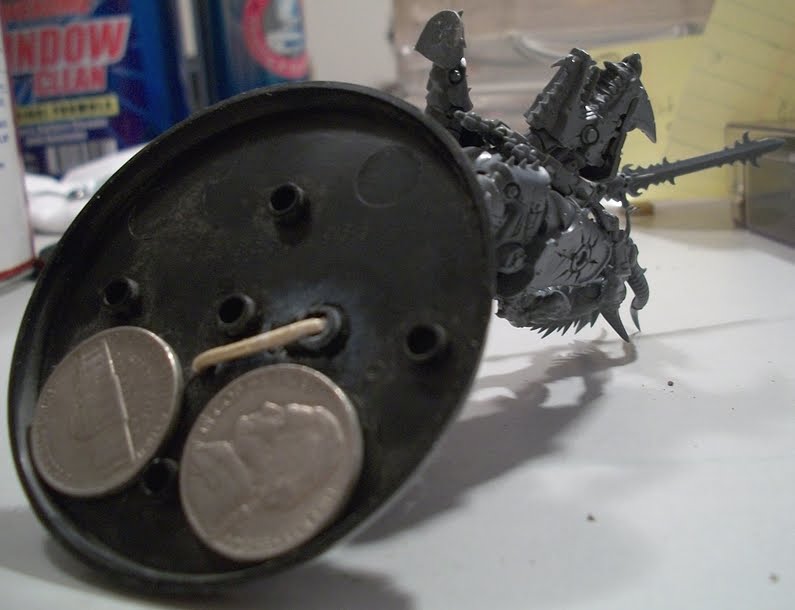
Now I'm off to base them. More pics coming soon :)


Creed and Kell: Painting the Standard

I inherited another commision, this time it's Creed and Kell for my friend's Cadian Imperial Guard. I've never painted a standard before so I was looking forward to the challenge.

Paints used -
Red areas: Mechrite Red.
Skin: Elf Flesh
Armor: Catachan Green
Cloth: Kommando Khaki
Boots: Codex Grey
Scrolls and Seals: Bleached Bone
Rope, belt, and gold area base: Scorched Brown
Metallic areas: Boltgun metal and Shining Gold


I started out with a white base coat. From here I painted what I was familiar with first, which was Kell's armor and effects.

You might notice the red area on the flag is a little lighter. I wanted to test how well it would coat and was pleased with the results. Mechrite red is a great foundation paint as long as it's thinned out a little bit (otherwise it's like painting with glue lol).


Slowly I worked in the chaos black to the banner. I took my time around the areas I wanted to remain white (like the aquilla).


Once the black was finished a little touch up was needed. I switched to a detail brush and carefully worked the edges. It helps to water the paints a little and keep the brush clean.


Filling in the other areas such as the sword hilt and wiring. Yellow was added to the search light and rope. The Standard lettering was based in mechrite red.


After a little more detail work the base is finished and ready for a wash.

Something I learned a while ago is to base any gold areas first with a brown base color. Gold is the only color that requires this in order to get a better effect.

Lava Board VI: Finished! (again)

I lied before when I said it was finished. By finished I meant that I was done painting it for a while and needed a break.

One thing I noticed later on, and compared to other examples, was the lack of contrast in the lava to the surface. It sort of looked like a river of burning cheese, lol. A river of molten cheese sounds cool, but I'll have to try that later.

After going over the lava again with a heavy dry brushing of orange, I added in a little red to the mix and gradually worked up to solid red. It definitely brought a nice contrast to the board.

.

Once that dried a mix of 6:1 red/medium gray was dry brushed over the surface again. This was followed up with a little pure black over the tips of the lava. I planned on skipping black this time, but I think it adds to the texture.

What lava board would be complete without some chaos-worshiper's ruins? For fun I took some extra foam and melted a few "faces" in it with the hot glue gun.


Lava Board V: Finished!

The Lava board is finished and ready for gaming! It took a few hours a day over the course of three weeks. Most of the time spent was gathering materials and changing the layout (I accidentally glued the wrong pieces down lmao). If I were to make this again, with what I've learned, it would probably take only a week with a majority of the time waiting for the caulking to cure.


This is the first bit of dry brushing. I used a bottle of gray rather than mixing black and white. I find it easier since you have the same exact color every time. I used a 3" brush over the surface areas and a 1 1/2" brush on the edges and lava channel.


A lot more dry brushing. After going over the surface and edges a few more times I added a little off white (bleached bone) to the mix and started dry brushing around the lava area. When the paint was nearly dried up I pressed firmly along the edges to exaggerate the shape of the cuts.


The board from a different angle. Here you can see the edging a little better. Notice the glow on the bridges? The terrain pieces were scrap from the lava areas. I'm planning to make more dynamic pieces later. Somebody asked about the wood bridge; it's actually for something else but it will do for now until I make a more appropriate one lol.


There you have it. A cheap and easy to make lava gaming board. Again I'd like to thank the original author for the inspiration. Had it not been for his great post I probably would have made a very basic board. I'm glad I took the time to make this and I can't wait to play test it!

A few things I'd like to add to his idea
  • The foam doesn't like to bond to adhesives. Be sure to prime it before bonding it.
  • Once the board is finished use a clear coat to seal it. This will help prevent wear-and-tear.
  • Blending the colors will add to the detail.
  • When painting try to paint like objects at the same time. I made the mistake of skipping a section and it was difficult to match it later.
  • Each 2x4 section used about 1 canister of adhesive and acrylic caulking for the lava. I recommend having 1 of each per section you make.
  • The biggest cost was the latex paint; it cost $22 at Home Depot. If you can get it cheaper this will cut your cost.
  • Subscribe to my blog! :P

From here I'm going to start building the area terrain and some taller sections. For the middle area I'm thinking of a making a floating Tzeentch fortress :)


If you decide to make your own I hope you found this tutorial helpful. :)


Lava Board IV: The Lava

Now comes the fun part: Painting the lava! I did mine a little differently than the tutorial. The big difference is I didn't use red (since I ran out and was too lazy to go buy some). I used more orange and a little brown (8:1 orange and gray) which turned out pretty nice.

It's up to you want to paint the lava, though I recommend mixing between the primary colors otherwise it won't look very realistic. Blending the colors in stages may take a few more minutes but the end result is much better.


I used a 1 1/2" brush and painted a liberal amount of yellow to the channels. Once that dried I went back and heavily painted the edges. I found it worked best to pour the paint directly onto the board then dab it with the brush.


Next, some orange was heavily dry brushed over the yellow areas. When the brush is almost out of paint run some around the lower edges of the lava channel. This adds a nice glowing effect to the rocks.


Once the orange dried a little medium gray was added (8:1) which gave it a nice brownish tint. I started by lightly brushing over the high points then gradually applying more pressure. Notice the darker areas had more brown applied to them which gives the impression of the lava cooling faster.

Once that dried I added a little black to the mix and ran it over the tips of the lava. Finally just black was applied over the top. It helps to run the brush over the land area first then test it on a paper towel.

The next update will have completed pictures :)